Installing UltraVNC
Step-by-step guide to install and configure UltraVNC Server on your target system.
Download UltraVNC
- Download UltraVNC from the official website
- You may need to wait for a few seconds before the download starts
- Locate the downloaded installer file on your computer
Installation Process
-
Open UltraVNC installer
- Double-click the downloaded installer file to begin installation
-
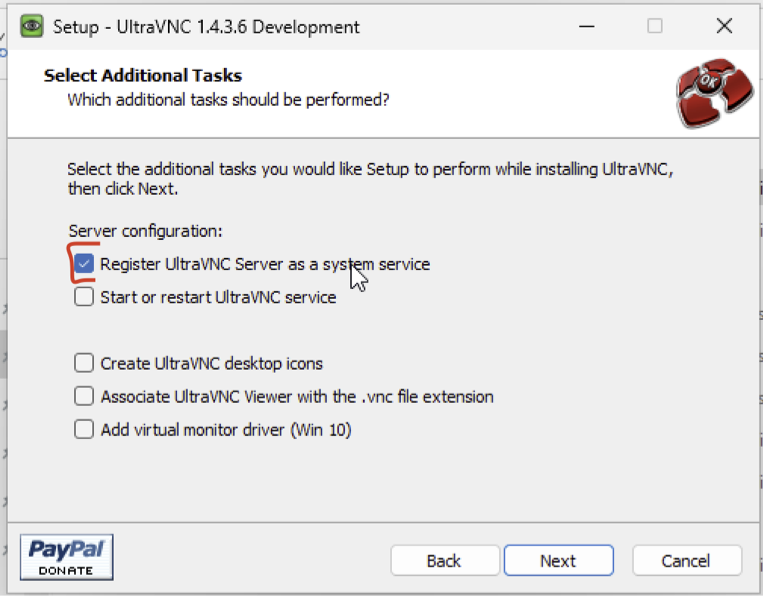
Follow the installation wizard
- Click through all installation steps
- Important: Make sure to select "Register UltraVNC Server as a system service" when prompted
- This ensures UltraVNC Server will start automatically with your system
-
Complete the installation
- Follow the remaining prompts to finish the installation process
Initial Configuration
Start UltraVNC Server
- Start the UltraVNC Server application
- The server should start automatically if installed as a service
- You can also manually start it from the Start menu or desktop shortcut
Configure Admin Properties
-
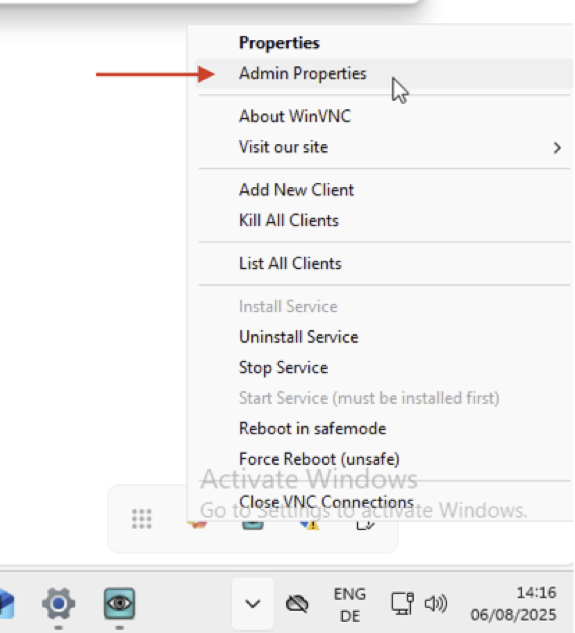
Open Admin Properties
- Right-click on the UltraVNC Server icon in the system taskbar
- Select "Admin Properties" from the context menu
-
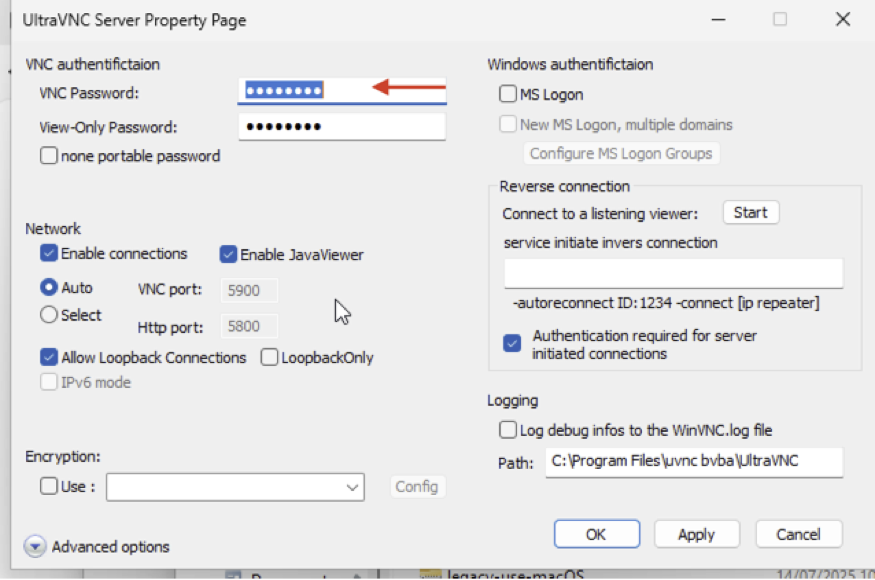
Set VNC Password
- In the Admin Properties window, locate the password settings
- Set a strong VNC password
- Important: Remember this password - you will need it to connect to the VNC server later
-
Apply Settings
- Click "Apply" or "OK" to save your configuration
Next Steps
Your UltraVNC Server is now installed and configured. You can now:
- Connect to this computer remotely using a VNC client
- Use the password you set to authenticate connections
- Access the server through the VNC port (default is 5900)
Troubleshooting
If you encounter issues:
- Ensure Windows Firewall allows UltraVNC Server
- Verify the service is running in Windows Services
- Check that the correct port is open for remote connections